Kitchen Remodeling – The First Steps

If you’re remodeling your kitchen, the first step is a noisy and messy one–tearing out old materials. This may mean rerouting plumbing and electrical lines, especially if you’re moving the location of major appliances.

If you’re buying new appliances, plan to order them in advance of starting the remodel. This way, you can minimize your downtime while you wait for deliveries. Visit the Kitchen Remodeling Lexington KY for more information.

Cost

A well-executed kitchen remodel has the potential to add value to a home. However, costs can easily exceed your budget without careful planning. Fortunately, there are several ways to cut corners and stay within your remodeling budget.

Material costs account for the majority of kitchen remodeling expenses. The quality, brand, and size of your materials can significantly impact costs. You can reduce costs by selecting economy-, middle-, or luxury-grade materials; limiting the number of upgrades; and shopping around for the best prices. For example, you can save by purchasing stock cabinets rather than custom ones. You can also find great deals on flooring, lighting, and appliances at online sale sites, salvage stores, and local resale shops.

Another major cost driver is plumbing and electrical work. Moving pipes, upgrading wiring, and extending gas and plumbing lines can quickly push up costs. Depending on the scope of your project, these expenses can account for anywhere from 15 to 25 percent of your total costs.

Demolishing walls can increase your labor costs by up to 40 percent. It’s important to note that removing load-bearing walls will require professional demolition services, which are more expensive than tearing down non-load-bearing walls. Other significant costs include new appliances, furniture, and fixtures. These can add up quickly, especially if you’re going for high-end finishes or appliances.

Kitchen cabinet costs typically account for 28 percent of the budget, with homeowners spending an average of $8,400 on their cabinets. This figure is often higher if you select custom cabinets, more than one type of material, or elaborate hardware. You can save by choosing less expensive cabinet options or opting for refacing over replacing.

Labor can account for 18% to 25% of your overall kitchen remodeling costs. This is because full-scale remodels that involve changing the footprint of a kitchen or adding extensions require more demolition, plumbing and electrical work. It’s essential to understand that many of these costs are not reimbursable by insurance, so it’s crucial to create a realistic budget and leave room for unexpected expenses.

Design

The kitchen is the heart of most homes, where families spend a lot of time together. It’s also where most meal prep and entertaining takes place, making it important that the layout is comfortable, efficient and attractive. A kitchen remodel provides the perfect opportunity to make these changes.

If your kitchen is dated, dark or cramped, you may want to consider a complete renovation. This is a bigger undertaking than replacing fixtures and finishes, and usually requires professional construction and design services. It might even involve moving walls, adding or removing utilities and extending the floor plan to add or change rooms.

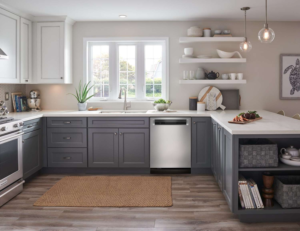
Before you get started, you’ll need to decide on a style and look that will suit your home and family. Reviewing kitchen photos and design ideas can help you narrow down your options. For a modern look, you might choose sleek cabinets and countertops in granite or quartz, open shelving and neutral colors like white or gray. If you’re remodeling a classic kitchen, on the other hand, you might choose wood cabinets and light-colored stone for a timeless look.

Once the design is finalized, it’s time to begin the project itself. Most remodels start with demo, which often involves tearing down existing wall and ceiling drywall to expose the structural framing. This step can be the most disruptive and costly, especially if it includes relocating utility pipes and modifying the heating, ventilating and air-conditioning system in the space.

After the framing work is finished, contractors can install new drywall and paint. This prepares the space for installation of the cabinets, countertop and flooring. Appliances go in next, followed by backsplash tile and window treatments. Depending on the scope of the remodel, lighting and other details can be added at any point.

While many homeowners take on small kitchen remodeling projects on their own, large-scale renovations typically require a general contractor and a team of designers, plumbers and other subcontractors. Some professionals offer both design and construction services, while others specialize in a particular type of remodel. If you’re planning a major renovation, you might need to obtain a permit from your city or town and comply with building codes.

Layout

Kitchen remodeling requires a lot of demolition and utility work. The first step is to tear out all of the appliances and cabinetry, including removing walls or portions of them. Once the space is empty, construction can begin. This includes laying in plumbing, electrical and gas lines to accommodate your new layout. Once the utility lines are in place, the carpentry crew can rebuild your walls, transforming your kitchen into a completely new room with more open space, structured enclosers and pass-through windows. Once the walls are finished, you can install flooring. Most homes use tile or roll-out vinyl, but composite laminate boards are gaining popularity. Finally, the installation of mouldings and kickboards completes the transformation into a beautiful kitchen.

Before you start your kitchen renovation project, consider the goals for the new room and how it will be used in the future. Then choose the layout that best reflects those goals. You may want to have a single wall of cabinets for maximum efficiency in a tight space, or you might prefer a horseshoe or U-shaped configuration with multiple working zones. If you have small children or elderly family members who will be using the kitchen, make sure to account for them when designing your space.

A basic kitchen remodel is a cost-effective way to upgrade your home’s kitchen without breaking the bank. It usually includes cosmetic changes such as repainting, adding or replacing hardware and updating appliances. It may also include minor structural alterations, such as relocating a sink or refrigerator. Depending on the scope of your project, this type of remodel can be completed quickly, which minimizes downtime and inconvenience.

A major kitchen remodel involves a more extensive change to the room’s layout and design, and is often accompanied by an overhaul of the lighting, electrical and plumbing systems. Major remodels generally take longer to complete and are more expensive than minor ones. They may require the removal of walls and ceilings or the addition of a window. They can also involve extensive drywall construction and expensive finishes, such as granite counters and hardwood floors.

Storage

A kitchen remodel can be a messy job. Unless you are a skilled DIYer and have experience framing in new windows, tearing down (potentially load bearing) walls or hanging expensive cabinets, hiring a contractor is the best way to ensure your project goes as smoothly as possible. A general contractor can also help you manage your project, keep you on schedule and on budget and act as a go-between for you and your plumber, electrician and flooring specialist.

Many homeowners don’t realize that there are a variety of storage options available during kitchen remodeling. For instance, you can add recessed shelves between studs in the wall to store things like spices and canned goods. These kitchen storage ideas are an easy, low-cost way to make your kitchen more functional and attractive.

Another option is to move your sink, stove and refrigerator into the walls. This allows you to free up cabinet and counter space for storage. However, it is important to consider the structural impact of removing walls and whether or not plumbing, electrical and venting will need to be moved as well.

If you’re considering moving appliances into the wall, be sure to talk to your designer and contractor about their cost, durability and resale value before making a decision. It can be much more expensive to relocate a refrigerator, cooktop or sink than you might expect.

During a kitchen remodel, it is important to organize your food, drink and cleaning supplies so that you can still have access to them while the construction takes place. This will save you a lot of money in extra restaurant meals and grocery trips.

Aside from a new sink, faucet and appliances, the largest costs in a kitchen remodel are usually the countertops, cabinets, flooring and backsplash tile. It’s a good idea to set aside a separate budget for these items so that you don’t overspend. It’s also a good idea to shop around and get price quotes before selecting materials.

How Ceilings Can Elevate a Room

A ceiling can add an airy feel to a home, and can also be a focal point of decoration. However, precise measurements are crucial to successful home improvement projects.

Service stairs offer a safe route for equipment and personnel in manufacturing, storage, and logistical halls. They can also serve as detours or emergency exits. Contact Ceilings Perth now!

Ceilings have a significant role in the acoustics of spaces. They can block out noise, absorb sound and reduce reverberation. However, they are often ignored in modern office buildings with open plan layouts. Poor acoustics can cause distraction and stress. Acoustic ceilings are an easy and cost-effective way to dampen noise and improve speech intelligibility.

Sound absorption is key for spaces where communication is essential, such as classrooms and conference rooms. The right acoustic ceilings can increase speech intelligibility by decreasing reverberation times, which can help people understand each other and follow conversations.

They can also protect patient privacy, which is critical for healthcare facilities. A well-designed acoustic ceiling can reduce ambient noise levels and create a comfortable environment where patients feel safe and supported in their recovery. In addition to improving acoustic conditions, acoustic ceilings can reduce work stress for hospital staff, helping them maintain focus and preventing overexposure to loud noises that can lead to fatigue and burnout.

The days when demising walls stopped at the ceiling, allowing sound to pass through to the space above, are long gone. Today, acoustic ceilings are an important part of the design of any space. They are typically rated by the NRC (noise reduction coefficient) to determine their performance as acoustic barriers.

While any ceiling will provide a level of sound blocking, specialty products with higher NRC ratings can significantly enhance the acoustic performance of a room. Other important ratings include CAC and NIC. CAC, which stands for Ceiling Attenuation Class, is the single-number rating of a ceiling system’s efficiency as a barrier to airborne sound transmission between enclosed rooms that share a common plenum.

NIC, which stands for Noise Isolation Class, is the single-number ranking of a ceiling system’s efficiency as an isolation barrier between enclosed spaces that share a common plenum. High NIC ratings are important in hospitals to maintain speech privacy between staff members, doctors and patients. They are also required by most healthcare facilities in order to comply with HIPAA requirements.

The lighting of ceilings can add to a room’s ambiance and elevate design features. Ceiling lights can also be used for task lighting or to highlight artwork and other elements in a space. When selecting a ceiling light, it’s important to consider the type of bulb that will be installed as well as other features such as dimming capabilities or adjustable light direction.

Depending on the style of light fixture, there are many different options to choose from. Some common ceiling light styles include chandeliers, pendants and flush mounts. Chandeliers come in a variety of shapes and sizes, from linear designs to crystal and Sputnik-style fixtures. Pendants are popular over kitchen islands, occasional tables and dining rooms and can be installed as a cluster of multiple fixtures or as a single drop. Flush mounts can be found in a range of styles including flat panels, frosted glass and metal.

Many ceiling lights are designed to illuminate a large area, unlike recessed lights which have a narrower focus. It’s important to know the total square footage of a space when determining how many ceiling lights are needed for an adequate amount of illumination. If a space has vaulted ceilings, it may be necessary to install more than one fixture to adequately light the entire area.

Ceiling lighting can accentuate design features like coffers, beams and vaulted ceilings. These unique architectural elements are often overlooked when it comes to lighting, but can be beautifully highlighted by cleverly illuminating them.

Other popular ceiling light types include track lighting and recessed downlights. Track lighting is a series of bulbs attached to a “track” that runs along the ceiling. The bulbs can be moved along the track to light art or other areas of interest in a room. Recessed downlights can be spread evenly throughout a space using a simple rule of thumb. A ceiling height of 8 feet will typically require recessed downlights spaced about 4 feet apart.

Energy efficiency is a growing concern amongst homeowners and businesses alike. Choosing ceiling lights that incorporate energy-efficient LED bulbs can reduce a space’s electricity consumption and lower utility bills over time. Other energy-saving options include motion sensors, solar capabilities and integration with smart technology.

While the walls of a room get all the attention, ceilings are ripe for creative rediscovery. After all, they influence a home’s sense of spaciousness and even its resale value. A little creativity could go a long way toward elevating the ceiling to its own decorative status as “the fifth wall.”

Ceilings may be classified into two major categories according to their construction: those that serve as an interior finish or those that fulfill structural functions, such as concealing conduits, heating and cooling ducts, and electrical or plumbing cables and installations. Some architects have sought to hide these elements from sight, while others have preferred an open, interstitial arrangement that allows for easy maintenance and repair.

One way to create a unique ceiling is by using tongue and groove wooden slats, planks or boards. These can be used as a ceiling surface for exposed, unsuspended or insulated panels, and can also serve as a base for drywall or other finishing materials. Wooden ceilings can be built as an exposed structure or with a grid system of joists and beams for suspended ceilings.

Some homeowners opt for a beamed ceiling, which highlights the timber frame and adds a rustic feel to a room. However, a beamed ceiling can be difficult to paint or reach fixtures due to its steep sloping nature. In addition, this type of ceiling often requires a larger amount of energy to cool because of its size and height.

Another way to make a ceiling more interesting is by adding texture to it. For example, Nicola created a ceiling design with borders of 1” x 4” lumber, which creates the look of a tray ceiling without taking up too much space. It also looks lovely with a simple emulsion – here Farrow & Ball’s Stone Blue – and complements the furniture, rugs and artwork in the space.

Creating a unique ceiling can be as simple as hanging strips of sandpaper, tar paper or cardboard to add pattern and dimension. Non-traditional ceiling materials like bricks, shingles and stones can also be used to make a ceiling more visually appealing. For a more upscale vibe, use patterned metals to add visual interest.

Ceilings are an area of the home that is often neglected. This is partly because of their height, but also because they can easily hide dirt and debris from view. However, cleaning your ceilings regularly can improve air quality and reduce health risks. This is because dust, cooking oil, smoke and other grime can all settle on ceilings over time. If left unattended, this can lead to eye irritation, asthma attacks and other respiratory problems. Fortunately, removing these contaminants from the home is relatively simple.

Most ceilings can be cleaned using a vacuum cleaner with a brush attachment or a duster. However, if your ceilings are textured, you will need to use a special tool. In addition, if the ceiling is stained you should use a cloth or sponge that has been slightly dampened with water to remove any soapy residue.

If you want to tackle a tough stain, mix a solution of equal parts water and white vinegar in a spray bottle. Then, apply this to the stain with a soft cloth and dab gently. Be careful not to oversaturate the ceiling with water as this can cause damage.

It is important to clean your ceilings on a regular basis, especially in commercial buildings. This will help to avoid the build-up of greasy dirt, which can be difficult to remove. In addition, it will ensure that any stains are removed quickly, preventing them from becoming permanent.

Keeping your ceilings clean will also prevent the build-up of mould, which is difficult to get rid of and can be very dangerous for people with breathing difficulties. Mould is also a sign of underlying problems such as leaks and should be addressed immediately.

If you are unsure of how to clean your ceilings, or need help with your recurring maintenance tasks, consider hiring an experienced professional. They will know the right materials to use, as well as strategies such as colour-coded rags to make cleaning easier and more effective. They can also advise you on any repairs that may need to be carried out on your ceilings such as sagging or water damage.

Radon Testing – Protect Your Family From the Dangerous Lung Cancer Caused by Radon

Radon Testing Colorado Springs is a cheap, simple way to protect your family from the deadly lung cancer caused by radon. It’s an easy test to do and can save your life.

The EPA recommends performing the test in the lowest livable level of your home. During the test, keep all windows and doors closed except for entering and exiting your house.

Short-term tests have been around for a long time and are used in many areas for home inspections. They are inexpensive and provide a quick result. They are often purchased as a sharp screen to determine whether or not a homeowner needs to take further action, such as radon mitigation. However, their results could be more accurate as radon levels vary daily and seasonally.

Short-term radon test kits typically include some canister with a filter to keep out radon decay products filled with activated charcoal. This is placed in the lowest living space of a home for an EPA-recommended period of 2-90 days. The canister is resealed and sent to the test vendor for analysis at the end of this testing period.

A home does not need to be mitigated if the short-term radon test results are below two pCi/L. But, it is still a good idea to test again in a year or two as underground flows of radon gas can change over time, especially if construction is nearby.

On the other hand, if the short-term radon test results indicate that the radon concentration is above the EPA action level of 4 pCi/L, it is best to follow the EPA’s recommendation and consider a radon reduction system to protect the family’s health.

While the perceived speed of a short-term test kit is tempting, the fact is that any time saved in getting a result may cost a homeowner thousands in unnecessary radon mitigation expenses or even his life from lung cancer. It is almost always worth spending the extra money on a longer-term test to get an accurate picture of radon in a home.

Generally, the longer-term radon tests require closed house conditions, which means that doors and windows are shut during the test period. These tests are usually performed throughout 3 to 12 months, which averages out the wild fluctuations in radon levels that can occur during shorter testing windows.

Most people know that radon is a deadly gas that can cause lung cancer. Unfortunately, the only way to determine if you are at risk is by testing your home for radon. This testing can be done by either using a do-it-yourself kit that you can buy at many hardware stores or hiring a professional. However, there are differences between the two tests that should be considered before you choose which one to use.

Do-it-yourself kits usually include an activated charcoal-based or electret ion radon test that measures radon levels for two to seven days and then sends them away for analysis. These tests are inexpensive and easy to perform, but they only give a snapshot of your home’s radon levels. If your results are high, consider getting a long-term or two short-term tests done back to back to get a more accurate picture of your radon levels.

If your results are below four pCi/L, you should consider a radon mitigation system to reduce the radon levels in your home. This system will reduce radon levels to safer levels so that you and your family can breathe more easily.

Several factors can affect your radon levels, including time of year and weather conditions. Conducting your test during the heating season when radon concentrations are highest is important. It is also a good idea to avoid running a short-term test during severe or windy weather, which can result in an inaccurate reading.

Radon levels can vary significantly from day to day, month to month, and year to year, so it’s important to regularly test your home for radon. Unlike short-term tests, long-term radon testing is conducted over 90 days to account for these fluctuations and provide a more accurate annual average.

EPA recommends that you test your home for radon every two years or at least once every five years. This will ensure that you understand your radon levels accurately and help you determine whether your home needs fixing.

Radon is a naturally occurring radioactive gas that seeps into buildings through cracks in the foundation and walls. It can increase the risk of lung cancer, especially in people who smoke or have a chronic cough. The best way to avoid radon exposure is by testing your home for it. Try your house yearly and do a long-term test before buying a property. You should also test your home after major renovations and when selling it.

It is important to hire a certified professional for radon testing. Many states require that radon professionals be certified at the national level or have state certifications. You can contact your state radon program for a list of qualified contractors in your area. You should also ensure that the lab analyzing your results is accredited. Accreditation means that trained and competent employees staff the lab and calibrate the equipment. This will reduce the likelihood of careless errors.

The National Radon Proficiency Program (NRPP) should certify a radon tester. Federal agencies and state radon programs recognize this certification, indicating that the technician has passed an exam and undergone an extensive background check. The NRPP certification also requires the technician to follow a code of ethics.

The EPA recommends hiring an accredited radon professional to determine the radon level in your home. This will help you decide whether or not to take measures to lower the radon levels. After major remodels or renovations, you should also test your home every five years. If the radon levels are elevated, hire a professional to install a radon reduction system.

Radon is a natural gas that seeps into homes, schools, and offices through cracks in the foundation and walls. Unlike other gases, it cannot be detected by smell or taste. It can only be seen through a radon test.

A radon test involves placing the radon detector in a location most affected by radon, such as the lowest living-in level of the home. The radon detector is placed in the house for 48 hours, and it is important to keep windows closed during this time. You can open and close doors as needed but should not run the furnace or use fans during testing.

Various radon testing options are available, from low-cost “do-it-yourself” kits to professional services. The results from the latter are usually more reliable than those from DIY kits, but they can be more expensive. Most professional radon testers employ alpha track detectors, which measure the decay of radon into ionized air particles that are picked up on a plastic film inside the test device. These devices are typically placed in the home’s lowest level, where people spend the most time. They should be closed for at least 12 hours before and during testing. The testers also advise that the device should be operated by something other than whole-house fans that re-circulate air.

Most professional radon tests can be done in a few days or less, depending on the type of test chosen. Some will summarize the results immediately, while others may need to be left longer. They are often conducted in the house’s basement, where they can be protected from weather. Most pros will charge a flat fee for a radon test, although they may have a travel fee for properties outside their standard service area.

A professional radon test costs around $125-$275, depending on the method used. Some professionals will include the radon test as part of a home inspection package, which can reduce the total cost. The EPA recommends that any home with a radon level of 4 pCi/L or higher be tested for radon, and many homes can be mitigated to a lower level after a radon mitigation system is installed.

It is recommended that homeowners test their homes for radon at least once a year. Tests should be performed between November 1 and March 31 since levels are generally higher in the winter when houses are heated. Homeowners should also test their homes if they are planning any major construction or remodeling work that could affect the radon level.

Radon is a colorless, odorless gas produced by the natural decay of uranium. It can enter the home through cracks in the foundation, gaps in the walls and floors, and openings around pipes. It can also get into the water supply in a household that uses a well. Fortunately, the radon level can be reduced safely with relatively easy and affordable methods.